
Planning some fertilization animation work, and the basic building block I’ll need is an animated sperm – i.e. with his little tail wiggling in a spiral fashion. Below is the process and some useful tips for someone else digging into something like this in Blender for the first time. (This assumes basic Blender familiarity and that you already have a simple sperm model)
Step 1: Create a helix curve
I’ll be honest – this basic step was actually the most difficult and challenging, and I’m embarrassed to say how long it took me to figure out. Blender didn’t seem to have any dynamic way to make a basic helix curve, the ‘screw’ deform option wasn’t cutting it, google wasn’t helping, and I wasn’t about to manually move points around.
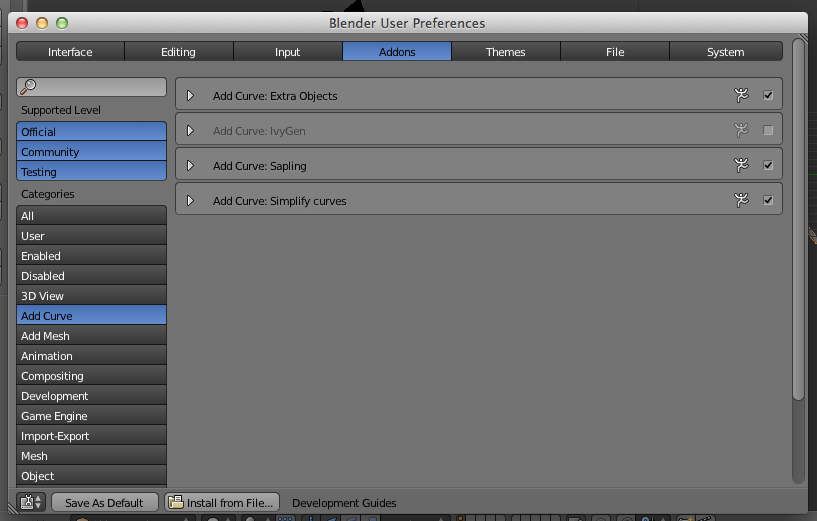
Finally I realized an important Addon wasn’t turned on: **if you need to make a helix in Blender, make sure under File / User Preferences / Addons, select ‘AddCurves’ on the left panel and check the box next to Add Curve: Extra Objects.
Step 2: Taper the Curve
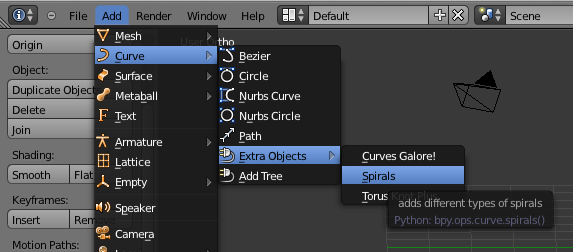
Now when you go to Add / Curves / you can choose “Extra Objects” and select either “Curves Galore” or “Spiral”. They both give you fine options for making a simple helix.
The only limitation is once you’ve made the helix, that’s it — no more editing revolutions and basic parameters. Fortunately they aren’t difficult to make.
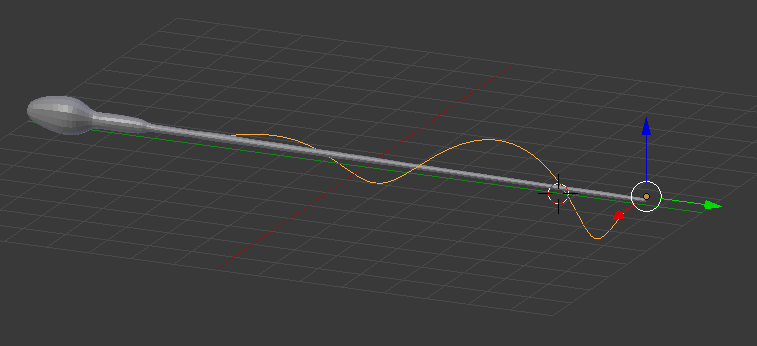
So now make a basic helix, sized appropriately with the revolutions you want, and align it next to your sperm model. We’re going to deform the sperm with the helix and animate the helix to add some motion.
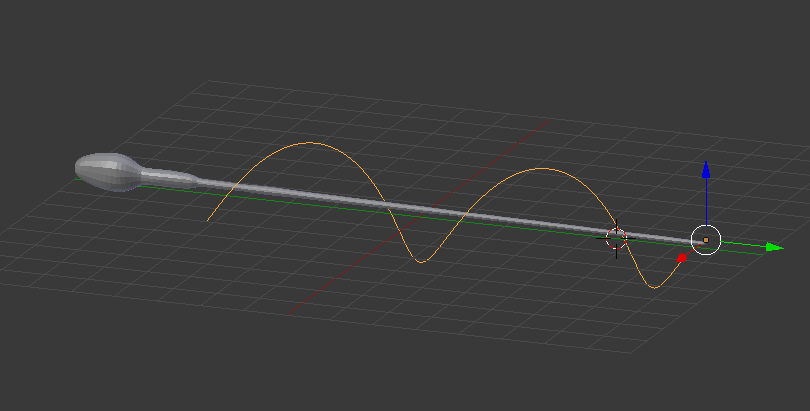
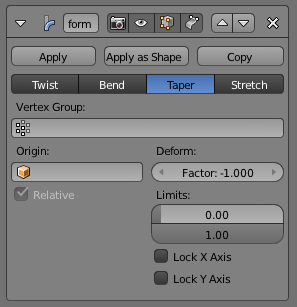
This is great, but the helix shape isn’t really right. We want to taper it to pretty much 0 curve by the head of the sperm, like below. So add a Simple Deform Modifier to your helix object, and select “Taper” in it’s options. Setting ‘Deform’ to -1 got what I was after.
Step 3: Deform the sperm with the curve
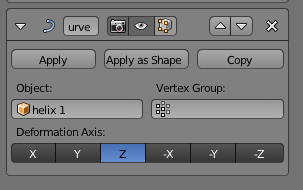
Now comes the fun part – linking the helix to the sperm! Select your sperm object, add a Curve Modifier. In the options, choose your helix object …. and bam! the Sperm takes on the spiral shape in the tail.
**for positioning, it helped to have the origin of the helix toward it’s tail end. I also needed to rotate the sperm along it’s Y axis a bit because its head was a bit tilted.

Step 4: Animate the helix
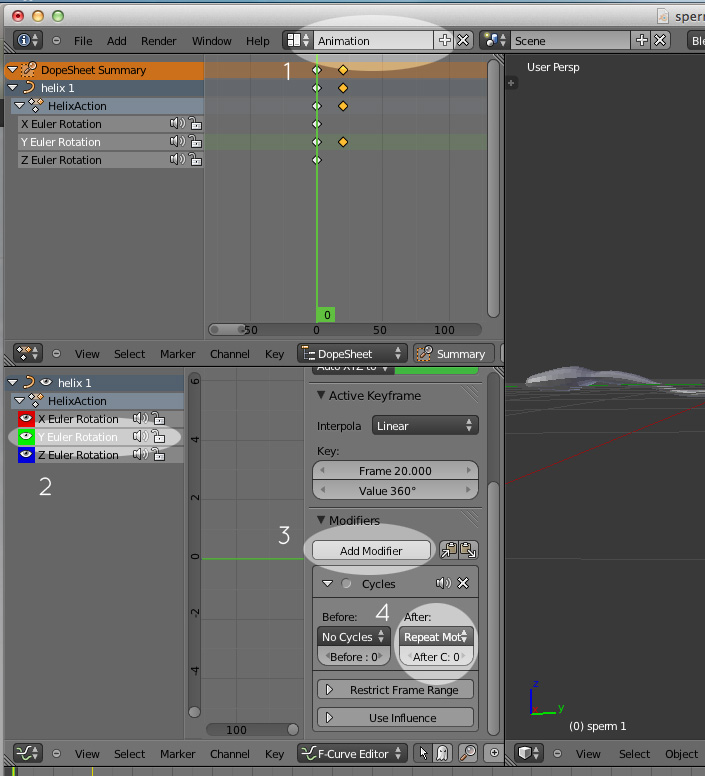
To animate this guy, all we do is rotate the helix! Add keyframes to rotate about it’s Y axis: I added keyframes at 0 and 20 in the timeframe, rotating from 0 to 360 degrees.
And of course we want this guy to keep swimming for a long time (he has a long journey after all), so rather than copy and paste these keyframes a bunch of times, switch to the Animation screen layout (select at the top of your window), and in the bottom animation view panel (the graph editor), click the little + button that’s on the far right of it, make sure you have the “Y Euler Rotation” selected on the left, and under Modifiers, choose Add Modifier / Cycles. Under After, make sure it says “Repeat Motion”.
Test it! Drag the cursor along the timeline and play, and watch the little sperm keep swimming! Right now he has some head wiggling too, but based on videos of sperm movement, that’s not unrealistic. And now we have a swimming sperm!
awesome!!!!!!!!!!